Like any other workday, you boot up your Mac Pro feeling ready to knock off the tasks on your to-do list. This has become your routine. But what if you suddenly see that the NVMe drive has disappeared on macOS? If your PCI-attached NVMe drives are randomly not mounting in macOS at boot, I have good and bad news. Check below.
Why Aren’t My NVMe Drives Not Mounting on macOS?
Let’s start with the bad news. The main cause of the issue hasn’t been found yet. That means there’s no permanent fix until now. Also, to prevent you from wasting time, check the list of symptoms and affected devices below. You don’t want to read a whole guide only to find out this isn’t about the issue you’re facing, right?
PCIe and NVMe macOS Mounting Issues: Affected Macs, Drives, and OS Versions
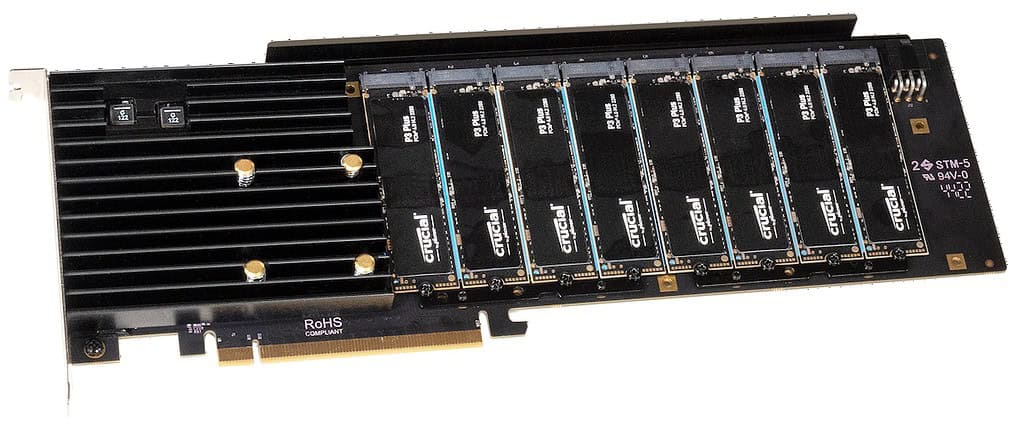
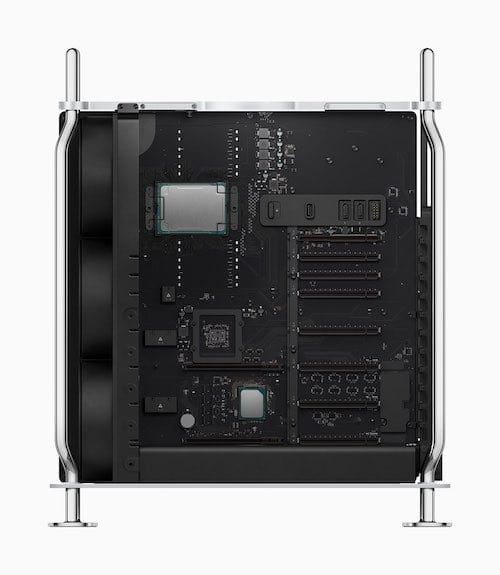
From what is presently known, the issue affects Mac Pros with PCIe extension cards that add NVMe slots. Most users have their drives in RAID configurations, although this may be unrelated. The issue has been reported by people using various different brands of PCIe cards and NVMe drives.
One user on Apple’s support forums reported having similar issues with their Mac Studio and a USB3 RAID enclosure. However, this is a different problem from the one this guide aims to fix, despite having symptoms in common.
Based on what is already known, this is a widespread bug affecting any macOS versions from Ventura 13.6.4 onwards. All macOS Sonoma (14) versions are affected. On macOS Sequoia (15), the issue hadn’t been solved until version 15.2. There’s a single report mentioning the 15.3 update provides a fix, but Apple’s release notes don’t mention any changes.
Identifying the Symptoms
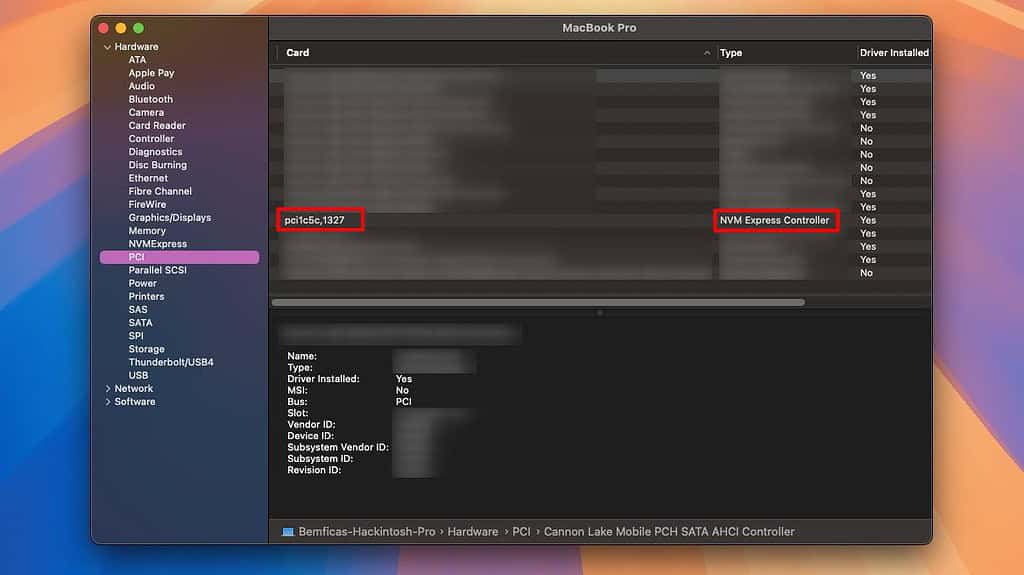
The easiest way to check if you’re covered by this article’s fixes is by checking the System Information app. You can find it in Applications > Utilities.
Under PCI, you’ll see your NVMe slots listed as multiple NVM Express Controller entries with sequential Slot numbers. They should be listed as something like Slot-X@YY,00,00. The X number will be the same, and the YY numbers will be sequential.
Possible Fixes for NVMe Drives on PCIe Cards Not Showing on macOS
As I said, I have good news as well. With Apple failing to provide a fix for months, users came up with makeshift solutions and workarounds.
1. Reboot in Safe Mode
This seems like generic advice, but I’m listing it for a reason. One of Safe Mode’s differences is that it only loads very basic system extensions — including hardware drivers. These extensions have worse performance than more advanced ones, but wider compatibility.
Because of that, rebooting in safe mode will likely allow you to, at least, mount and open your NVMe drives. This can be a quick workaround if you need to access something in them. From here, you can copy the drives’ contents somewhere else.
Some users also reported their NVMe drives were mounting properly in macOS after restarting, even if not in Safe Mode. This isn’t a permanent solution, however, since the issue comes back after one or two reboots.
Lastly, Safe Mode flushes and rebuilds the system’s caches, including the kernel extensions (“Kexts”) cache. On macOS, hardware drivers are mostly stored in kernel extensions. There’s a chance that, when you read this guide, the issue has been fixed, but macOS is loading a cached Kext. In this case, rebooting in Safe Mode and then back in normal mode will be enough to re-cache the Kexts.
2. Check for Up-to-Date Drivers
Another solution that may seem silly at first. However, some manufacturers apparently were able to find a solution themselves. HighPoint and OWC have software updates that can, at least partially, fix the issue.
3. Initialize the Drives in SoftRAID

One user was able to find a workaround for people using SoftRAID. This may work for PCIe cards from OWC, which makes the SoftRAID app, and from other brands as well.
It’s important to note that initializing a drive erases all its contents. Therefore, make sure you have made a backup or copied the drives’ contents elsewhere before doing the procedure below. Here’s what you have to do:
Time needed: 5 minutes
- Download the latest SoftRAID version and open it. Your PCIe card and its NVMe drives should appear, but as “unmounted”.
- Select your card on the right-side list. Hold Command and click on the NVMe drives, on the left-side list, to select all of them.
- On the menu bar, select Disk > Initialize….
- You’ll see a warning that initializing the disks will erase them. If the content is backed up, click Initialize.
- Open the macOS Disk Utility app in Applications > Utilities.
- In the menu bar, select File > RAID Assistant… and follow the on-screen instructions to remake your RAID array.
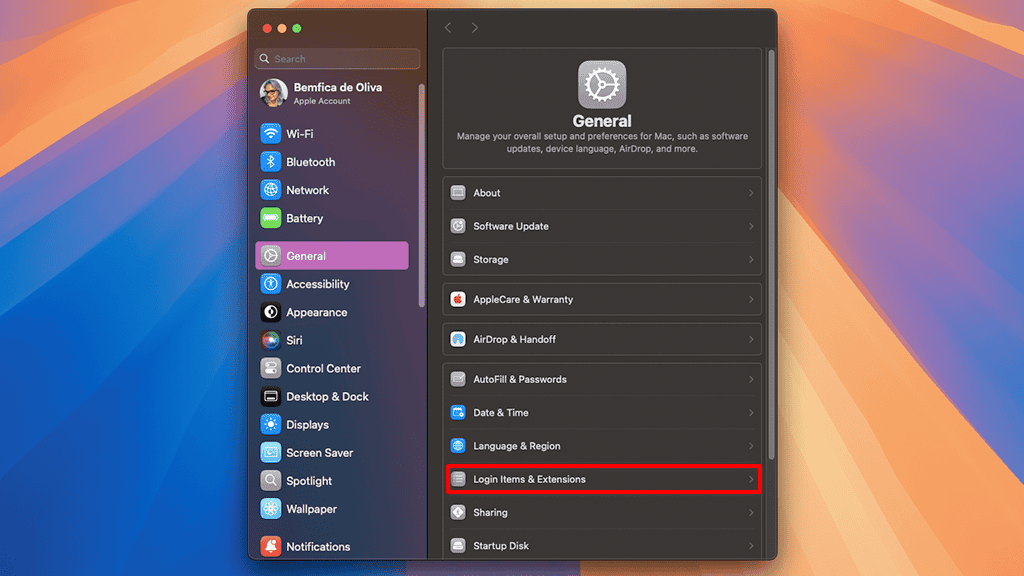
4. Disable Login Items, Extensions, and Background Apps
One user reported that their NVMe drives mounted correctly after disabling all background apps and login items. There’s a chance that this was just a coincidence, and it happened because of the multiple reboots. In any case, try the following:
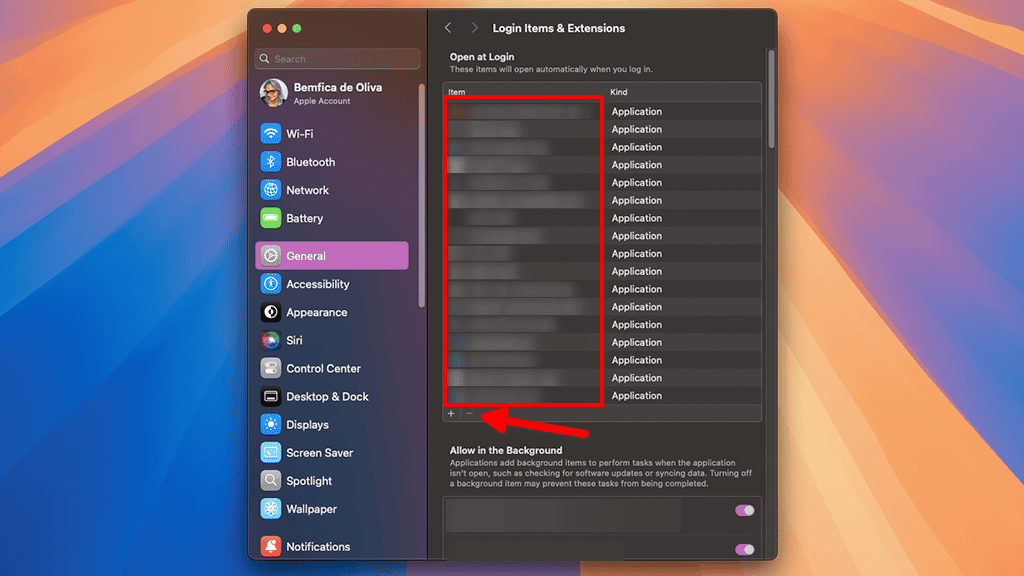
- Open the System Settings app and go to General > Login Items and Extensions.

- Select all apps under the Open at Login list. Click the – button to remove them.
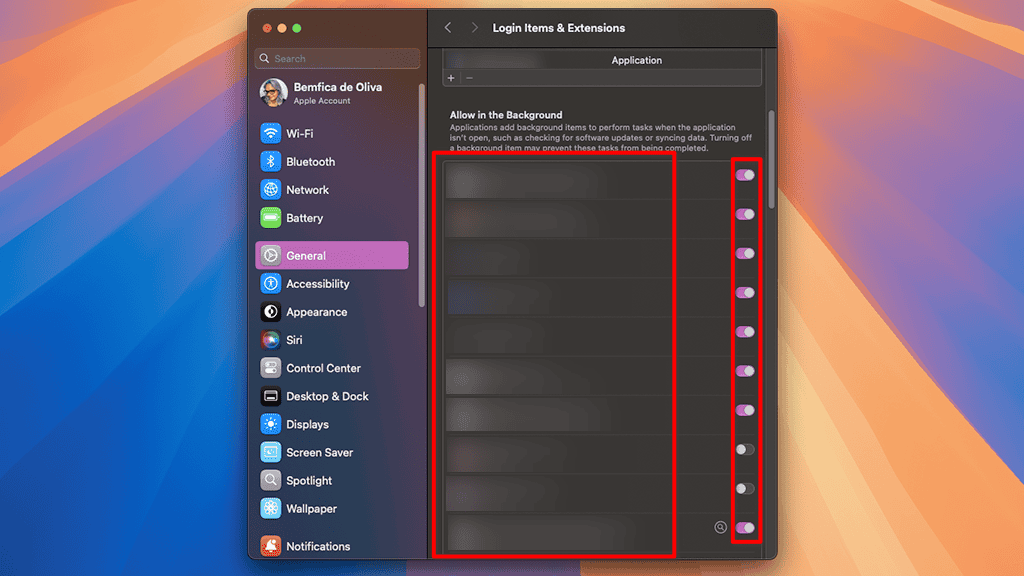
- Below that, you’ll see another list, called Allow in the Background. Turn off all the toggles in that list.
- Restart macOS and check if your NVMe drives are mounting or not.
 NOTE
NOTE
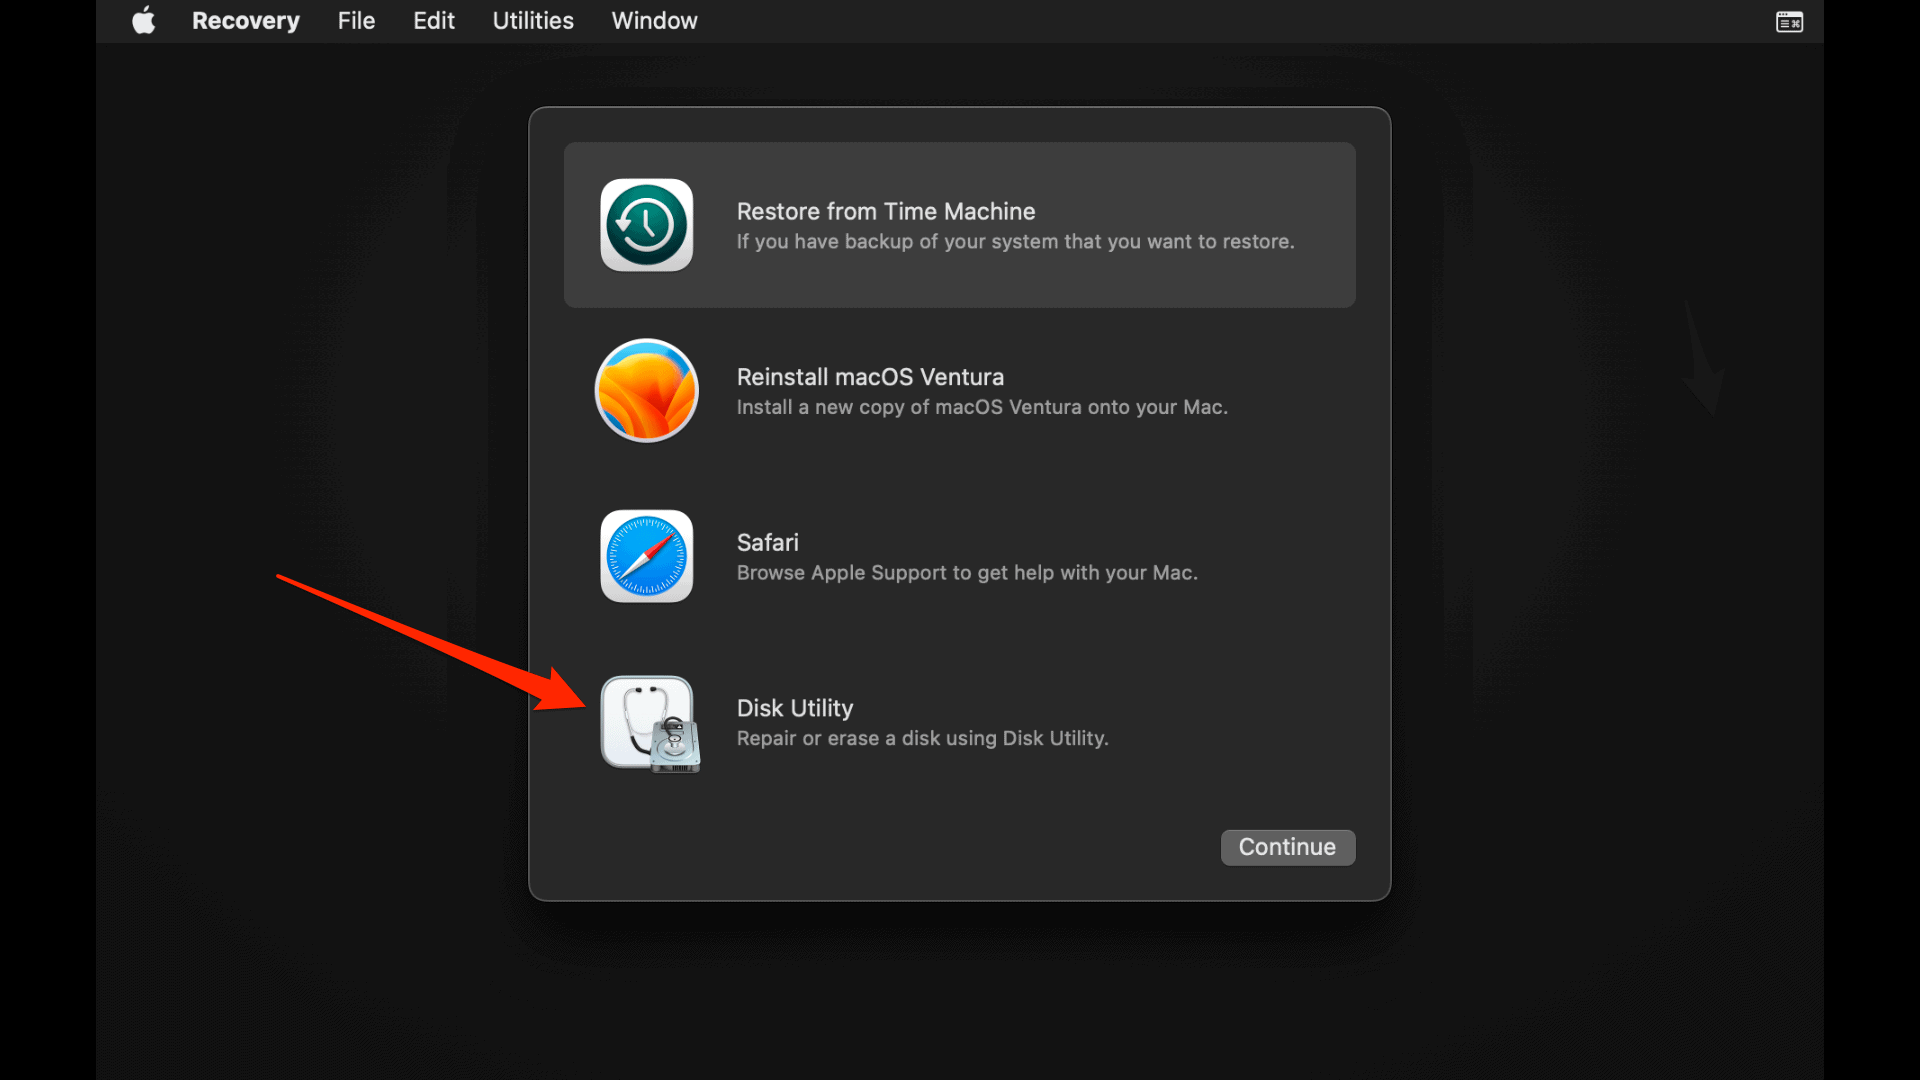
5. Reset NVRAM, Reboot in Recovery Mode, and Run First Aid on the Drives
One user mentioned that a procedure in recovery mode may help to mount the drives. This needs to be done frequently, though, because the issue comes back one or two reboots later. It’s an easy workaround, however, and can be handy until a permanent fix is released. Do the following:
- Turn your Mac off and perform a NVRAM/PRAM reset. The exact key combination varies depending on whether you have an Intel or Apple Silicon processor.
- After that, restart your Mac in Recovery Mode. Again, the key combination is different for Intel and Apple Silicon Macs.

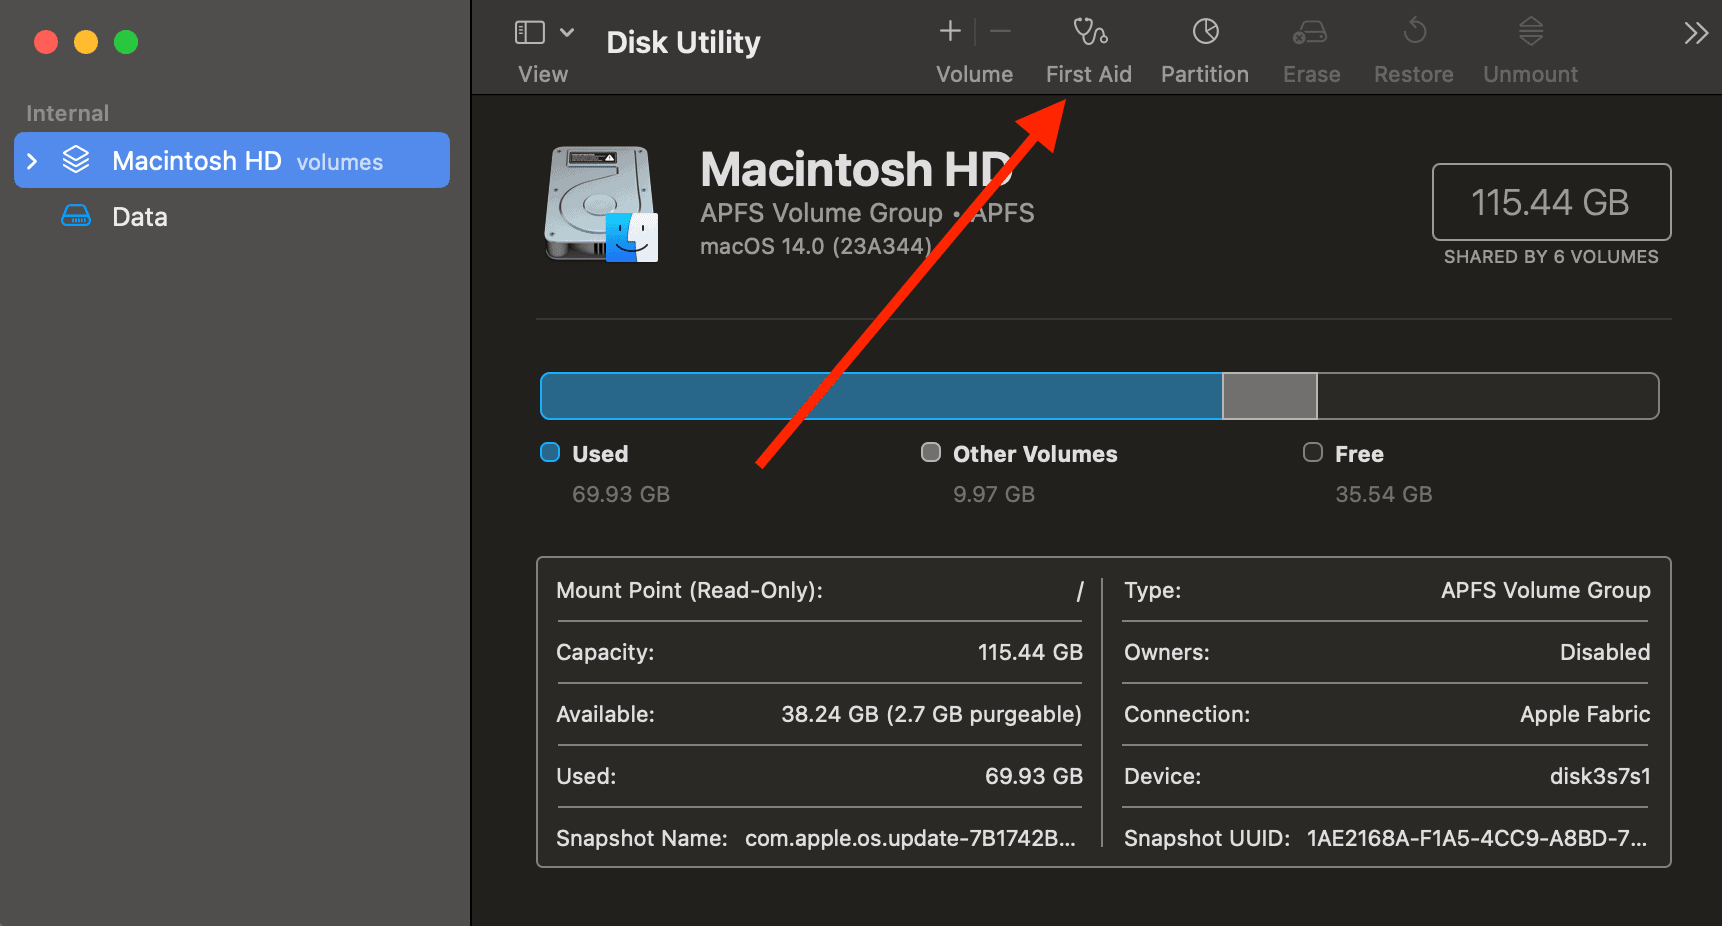
- In the Recovery Mode menu, click on Disk Utility.

- You’ll be able to see your NVMe drives. Select each of them and run First Aid by clicking the button in the top menu.
- Restart your Mac and your drives should mount correctly.
6. Re-Seat Your PCIe Cards
This workaround is simple and relatively easy — “unplug everything, open your Mac, then connect everything again, daily” easy, that is. However, I wouldn’t recommend it unless none of the above methods worked.
That’s because PCI slots haven’t been designed to endure frequent removal and re-insertion of cards. They may get loose, or, even worse, the card or the slot itself may break eventually. If you resort to this method, it would be wise to keep your Mac on as long as you can. Macs don’t tend to slow down or be more vulnerable to hardware failures for running several days in a row.
In any case, the idea is very simple. Before turning your Mac on, open it, remove the PCIe card, then put it back. That’s it. Apparently, the bug doesn’t affect “freshly installed” cards.
7. Try Different PCIe Slots
At first, this seems the same as the above. However, this solution may hold on multiple reboots, and you won’t need to mess with your PCIe cards as frequently.
Simply swap the card holding the NVMe slots with another one. If this is the only PCIe card on your Mac Pro, then just move it to another slot. Keep in mind, however, that going from, e.g., a x16 to a x8 slot will halve transfer speeds.
8. If Using Multiple Cards, Disable RAID on Some
A similar solution to the previous ones, but that doesn’t involve physically moving your cards, is disabling RAID. This, however, only works if you have multiple PCIe to NVMe cards, and are using RAID on two or more.
One user at the MacRumors forum reportedly was able to mount the NVMe drives in their two cards that way. The limitation is that this solution doesn’t apply for users with a single card, or that aren’t using RAID setups. Also, there’s the major drawback that you’ll be unable to use RAID.
9. Install a Version of macOS Without the Issue
A good thing about this issue is that we know exactly which macOS versions NVMe drives aren’t mounting. An effective, but not fast, solution, is simply installing a version in which the PCIe cards work.
As stated at the beginning, no Sonoma version so far is known to work. For Ventura, you’ll need v13.6.3 or earlier.
There were a couple of reports that the issue was fixed in macOS Sequoia 15.1.1, but this is not confirmed. Apparently, 15.3 has at least a higher success rate of “reboots needed until mounting” than other Sequoia and Sonoma versions.
Downgrading macOS
One thing to consider is that there is no direct way of downgrading macOS. You’ll need to install the system from scratch, and then restore it from a Time Machine backup.
Officially, restoring a Time Machine backup from a newer macOS version isn’t supported. It’s still doable, though, but you may need to skip the Migration Assistant during the initial setup. Configure macOS with a temporary user account, open Migration Assistant from it, and only then restore your Time Machine backup. You’ll still need, however, to define all system settings, app preferences, and so on.
Consider Setting Up a Test Environment
Also, to prevent having to deal with even worse scenarios, I recommend you set up a test environment. Grab a USB3 or Thunderbolt external disk, install macOS to it, and then test if the NVMe drives are mounting. If they do, you’ll likely be safe to update on your main machine. If they don’t, you won’t need to roll back the update, saving several hours of work.
As the name implies, Mac Pros are intended for professional use. In addition to that, PCIe expansion cards with NVMe slots are aimed at people who work with lots of data. “Several terabytes” lots, specifically, and the kind of work that usually is critical and expensive. The fixes above may help, but Apple may be responsible for people losing considerable time — and money — looking for them.